 MonoGame is a cross platform open source implementation of Microsoft’s XNA framework. MonoGame has been under active development for many years and has been used in a number of games on iOS, Android, Ouya, and of course Windows 8 and Windows Phone 8. In this post, we will cover how to set up your project structure to build for Windows Phone 8 and in an earlier post for Windows 8. We will also add a few elements to our scene to see it work. In later posts, we will build a complete game using MonoGame.
NOTE: Although the title of the post references MonoGame 3.2, as of the publication date of this post, the team has not yet released version 3.2. This post will be using a pre-release version of MonoGame 3.2 and will be updated once 3.2 is released.
Updates:
4/13/2014 – Updated for Official MonoGame 3.2 Release
This is second part of the MonoGame 3.2 series, you do not need to read the first part to begin. This post stands completely on it’s own.
You can get the MonoGame libraries in three different packaging formats; source, installer or NuGet. Recently (as of March 2014 ), the MonoGame team has changed how the source is built, so I will not be covering that here. Using the installer is fairly straightforward as well, but offers less in how to build for multiple platforms. In this post we will be using the NuGet packages to configure the projects files and build our first sample.
There are literally tons of examples that use XNA to demonstrate some game technique, mechanic or even entire games. This tutorial extends a tutorial that was published on the MSDN site for XNA Game Studio 3.1. For this series the code and tutorial text has been updated to match the MonoGame Framework. For other tutorials and samples, in general, if the code was written for XNA Framework version 4.0 or for the Windows Phone, then it should work with very few changes.
Create a Windows Phone Project
- Start by opening Visual Studio 2012 Pro or higher or Visual Studio 2012 Express for Windows Phone 8
- From the menu select File –> New Project
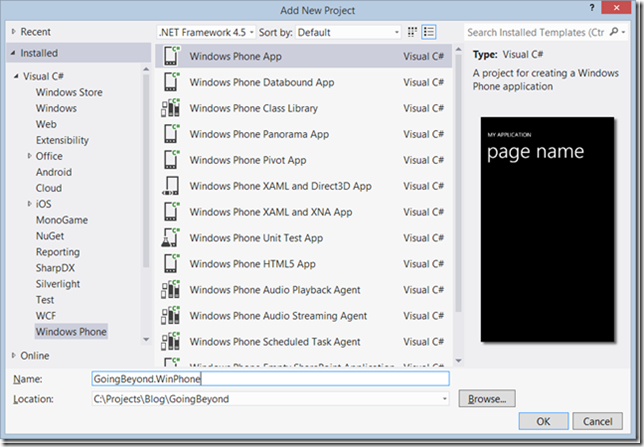
- Select the template; Visual C# –> Windows Phone –> Blank App (XAML)
- Name the project “GoingBeyond”
- Click OK
- When prompted for a Target Windows Phone OS Version: select Windows Phone OS 8.0
- Click OK
Configure MonoGame References
NuGet is the default package manager for Visual Studio. The MonoGame team has a set of NuGet packages that can be installed into your projects in order to use the functionality of the libraries.
For the project we just created we will add one or more NuGet packages. Follow the instructions below to install the correct MonoGame packages;
- Right Click the GoingBeyond project, select Manage NuGet Packages
- On the the list on the left, select Online then nuget.org to display a list of available packages.
- In the search box in the upper right hand corner type MonoGame
- Look through the list to find MonoGame, select it
- Click the Install button to install the package.
- Click Close
- Open the Properties folder and Double Click the WMAppManifest.xml file
- Change the Navigation Page field to GamePage.xml
- Click the Save icon
- Remove the MainPage.xml from the project
Test the Project
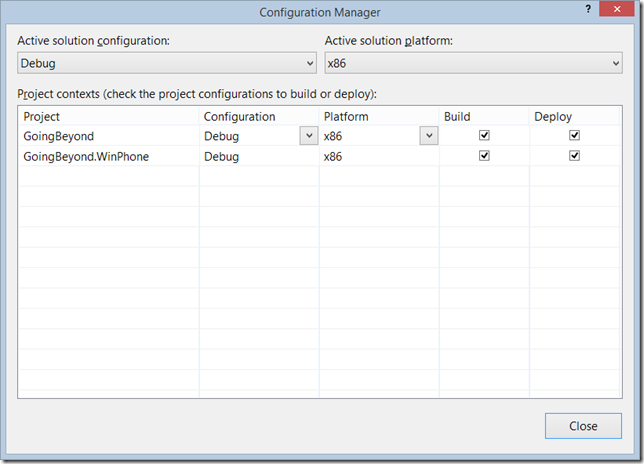
- In the main toolbar, open the Configuration Manager from the Target Platform drop down.

- In the Configuration Manager dialog box change the Active Solution Platform from Any CPU to x86
This will allow you to run the game in the Windows Phone Emulator, if you are using a physical device, then select ARM.
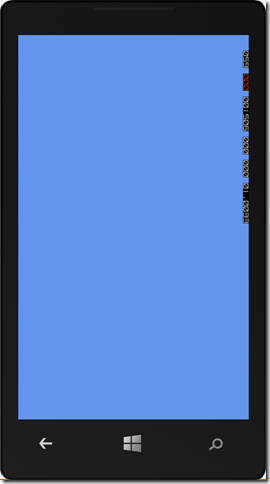
- Hit F5 to run your project, you should see a blue screen displayed after the project compiles and deploy.

Add the Content
The first thing that you will need before you start coding are some art assets to play around with. In this case, you need a 3D model, and an associated texture file so that the model has some detail. These assets will be loaded into your game using MonoGame’s implementation of the XNA Framework Content Pipeline.
You can find these assets in this sample file (GoingBeyond_Content.zip). Download the sample file now and extract its contents to a directory on your local drive.
To add the content files to your project, drag the Content folder onto your GoingBeyond project file in Visual Studio. This will add all of the content files to your project. To have Visual Studio include the files as part of your package for the Windows Store, you need to set the Build Action property on each file under the new Content folder to Content.
Load the Model Using the Content Pipeline
You need to add to the way the initialization and content loading are handled. Starting from the top of the Game class and continuing down to just above the call to Update, modify the code as follows:
GraphicsDeviceManager graphics;

//Camera/View information
Vector3 cameraPosition = new Vector3(0.0f, 0.0f, -5000.0f);
Matrix projectionMatrix;
Matrix viewMatrix;

//Visual components
Ship ship = new Ship();

public Game1()
{
    graphics = new GraphicsDeviceManager(this);
    Content.RootDirectory = "Content";
}

/// <summary>
/// Allows the game to perform any initialization it needs to before
/// starting to run. This is where it can query for any required
/// services and load any non-graphic related content.
/// Calling base.Initialize will enumerate through any components
/// and initialize them as well.
/// </summary>
protected override void Initialize()
{
    projectionMatrix = Matrix.CreatePerspectiveFieldOfView(
        MathHelper.ToRadians(45.0f),
        GraphicsDevice.DisplayMode.AspectRatio,
        1.0f, 10000.0f);
    viewMatrix = Matrix.CreateLookAt(cameraPosition,
        Vector3.Zero, Vector3.Up);

    base.Initialize();
}

private Matrix[] SetupEffectDefaults(Model myModel)
{
    Matrix[] absoluteTransforms = new Matrix[myModel.Bones.Count];
    myModel.CopyAbsoluteBoneTransformsTo(absoluteTransforms);

    foreach (ModelMesh mesh in myModel.Meshes)
    {
        foreach (BasicEffect effect in mesh.Effects)
        {
            effect.EnableDefaultLighting();
            effect.Projection = projectionMatrix;
            effect.View = viewMatrix;
        }
    }
    return absoluteTransforms;
}

protected override void LoadContent()
{
    ship.Model = Content.Load<Model>("Models/p1_wedge");
    ship.Transforms = SetupEffectDefaults(ship.Model);
}

/// <summary>
/// UnloadContent will be called once per game and is the place to unload
/// all content.
/// </summary>
protected override void UnloadContent()
{
}
This code allows for the ship to be loaded from the file system and placed properly in your scene.
Drawing a Ship
Think of the idea of a ship on the screen. It is drawn using a Model class, it has a position tracked by a Vector3, and still another Vector3 tracks velocity. A float tracks the rotation angle. Each of these data types is modified or checked in different places along the code path, and while the end result looks good to the user, the drawback comes when you try to extend the gameplay to include another object that needs similar data.
If, for instance, you wanted to add a second ship that would also draw on the screen, and had the ability to move and turn, you would have to create a copy of each of the variables you were using for the first ship. You would have to duplicate the code you wrote that checked and modified each variable. Each copied line would be nearly identical to the original line, except that it was acting on a new variable.
For a game that will ultimately have more than a dozen objects all drawing and moving around, this is unworkable. The duplicated code would make your code unreadable and painful to modify. However, there is a better way. If you create a code object that holds the common variables that allow you to draw and move a 3D object, then maintain a list of these objects, you can draw and move them all together using the same code. This process is called encapsulation, and is the beginning of object-oriented programming, which becomes more and more important the larger your game becomes.
Start by right-clicking on your project in Solution Explorer, and select Add, then Class. Type Ship.cs into the Name box, then click Add.
When you add the new file, it will open up in the code window. This new file represents a class, or code object. This particular class is named Ship. You will notice it is very minimal now; modify it so it looks like the following:
using System;
using System.Collections.Generic;
using System.Text;
using Microsoft.Xna.Framework;
using Microsoft.Xna.Framework.Content;
using Microsoft.Xna.Framework.Graphics;
using Microsoft.Xna.Framework.Input;

namespace GoingBeyond
{
    class Ship
    {
        public Model Model;
        public Matrix[] Transforms;

        //Position of the model in world space
        public Vector3 Position = Vector3.Zero;

        //Velocity of the model, applied each frame to the model's position
        public Vector3 Velocity = Vector3.Zero;

        public Matrix RotationMatrix = Matrix.Identity;
        private float rotation;
        public float Rotation
        {
            get { return rotation; }
            set
            {
                float newVal = value;
                while (newVal >= MathHelper.TwoPi)
                {
                    newVal -= MathHelper.TwoPi;
                }
                while (newVal < 0)
                {
                    newVal += MathHelper.TwoPi;
                }

                if (rotation != newVal)
                {
                    rotation = newVal;
                    RotationMatrix = Matrix.CreateRotationY(rotation);
                }

            }
        }
    }
}
You can see that the Ship class now does a lot—it holds onto the ship's position, velocity, rotation, and 3D model, and has its own Update method that will move the ship around.
Now that you have created the Ship class, you need to change the code in the Game1.cs code file to take advantage of this new, encapsulated data. Double-click on Game1.cs in your Solution Explorer.
Start with drawing the ship's model. You will be drawing Model objects on the screen, so create a method that will draw a chosen Model. Below the Draw method, add a new method called DrawModel, like so:
public static void DrawModel(Model model, Matrix modelTransform,
    Matrix[] absoluteBoneTransforms)
{
    //Draw the model, a model can have multiple meshes, so loop
    foreach (ModelMesh mesh in model.Meshes)
    {
        //This is where the mesh orientation is set
        foreach (BasicEffect effect in mesh.Effects)
        {
            effect.World =
                absoluteBoneTransforms[mesh.ParentBone.Index] *
                modelTransform;
        }
        //Draw the mesh, will use the effects set above.
        mesh.Draw();
    }
}
This DrawModel method takes your model-drawing algorithm and applies it to any Model object passed into it, drawing the Model on the screen. Next, modify the Draw call so that it calls this new method:
protected override void Draw(GameTime gameTime)
{
    graphics.GraphicsDevice.Clear(Color.CornflowerBlue);

    Matrix shipTransformMatrix = ship.RotationMatrix
            * Matrix.CreateTranslation(ship.Position);
    DrawModel(ship.Model, shipTransformMatrix, ship.Transforms);
    base.Draw(gameTime);
}
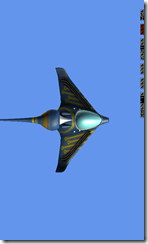
If you run your game now you should see the ship displayed in the center of the screen, like so:
Wrapping up
This concludes this part of the introduction. You were able to create a new empty Windows 8 project, and add the MonoGame libraries. You used the MonoGame Framework to draw a 3D model of a ship on the screen. And you were able to run the game in the Simulator and see the ship drawn on the screen. Stay tuned for the remainder of this game in future posts.


